What I Learned from doing Gold Leaf Portraits
Gold leaf portraits have been a trend that comes and goes, with a LOT of photographers trying it, but only a few successfully pulling it off. There is a big learning curve to this style of portraits, and after trying it myself, I am here to share my thoughts on the entire process!
SUPPLIES USED:
THINGS TO CONSIDER…
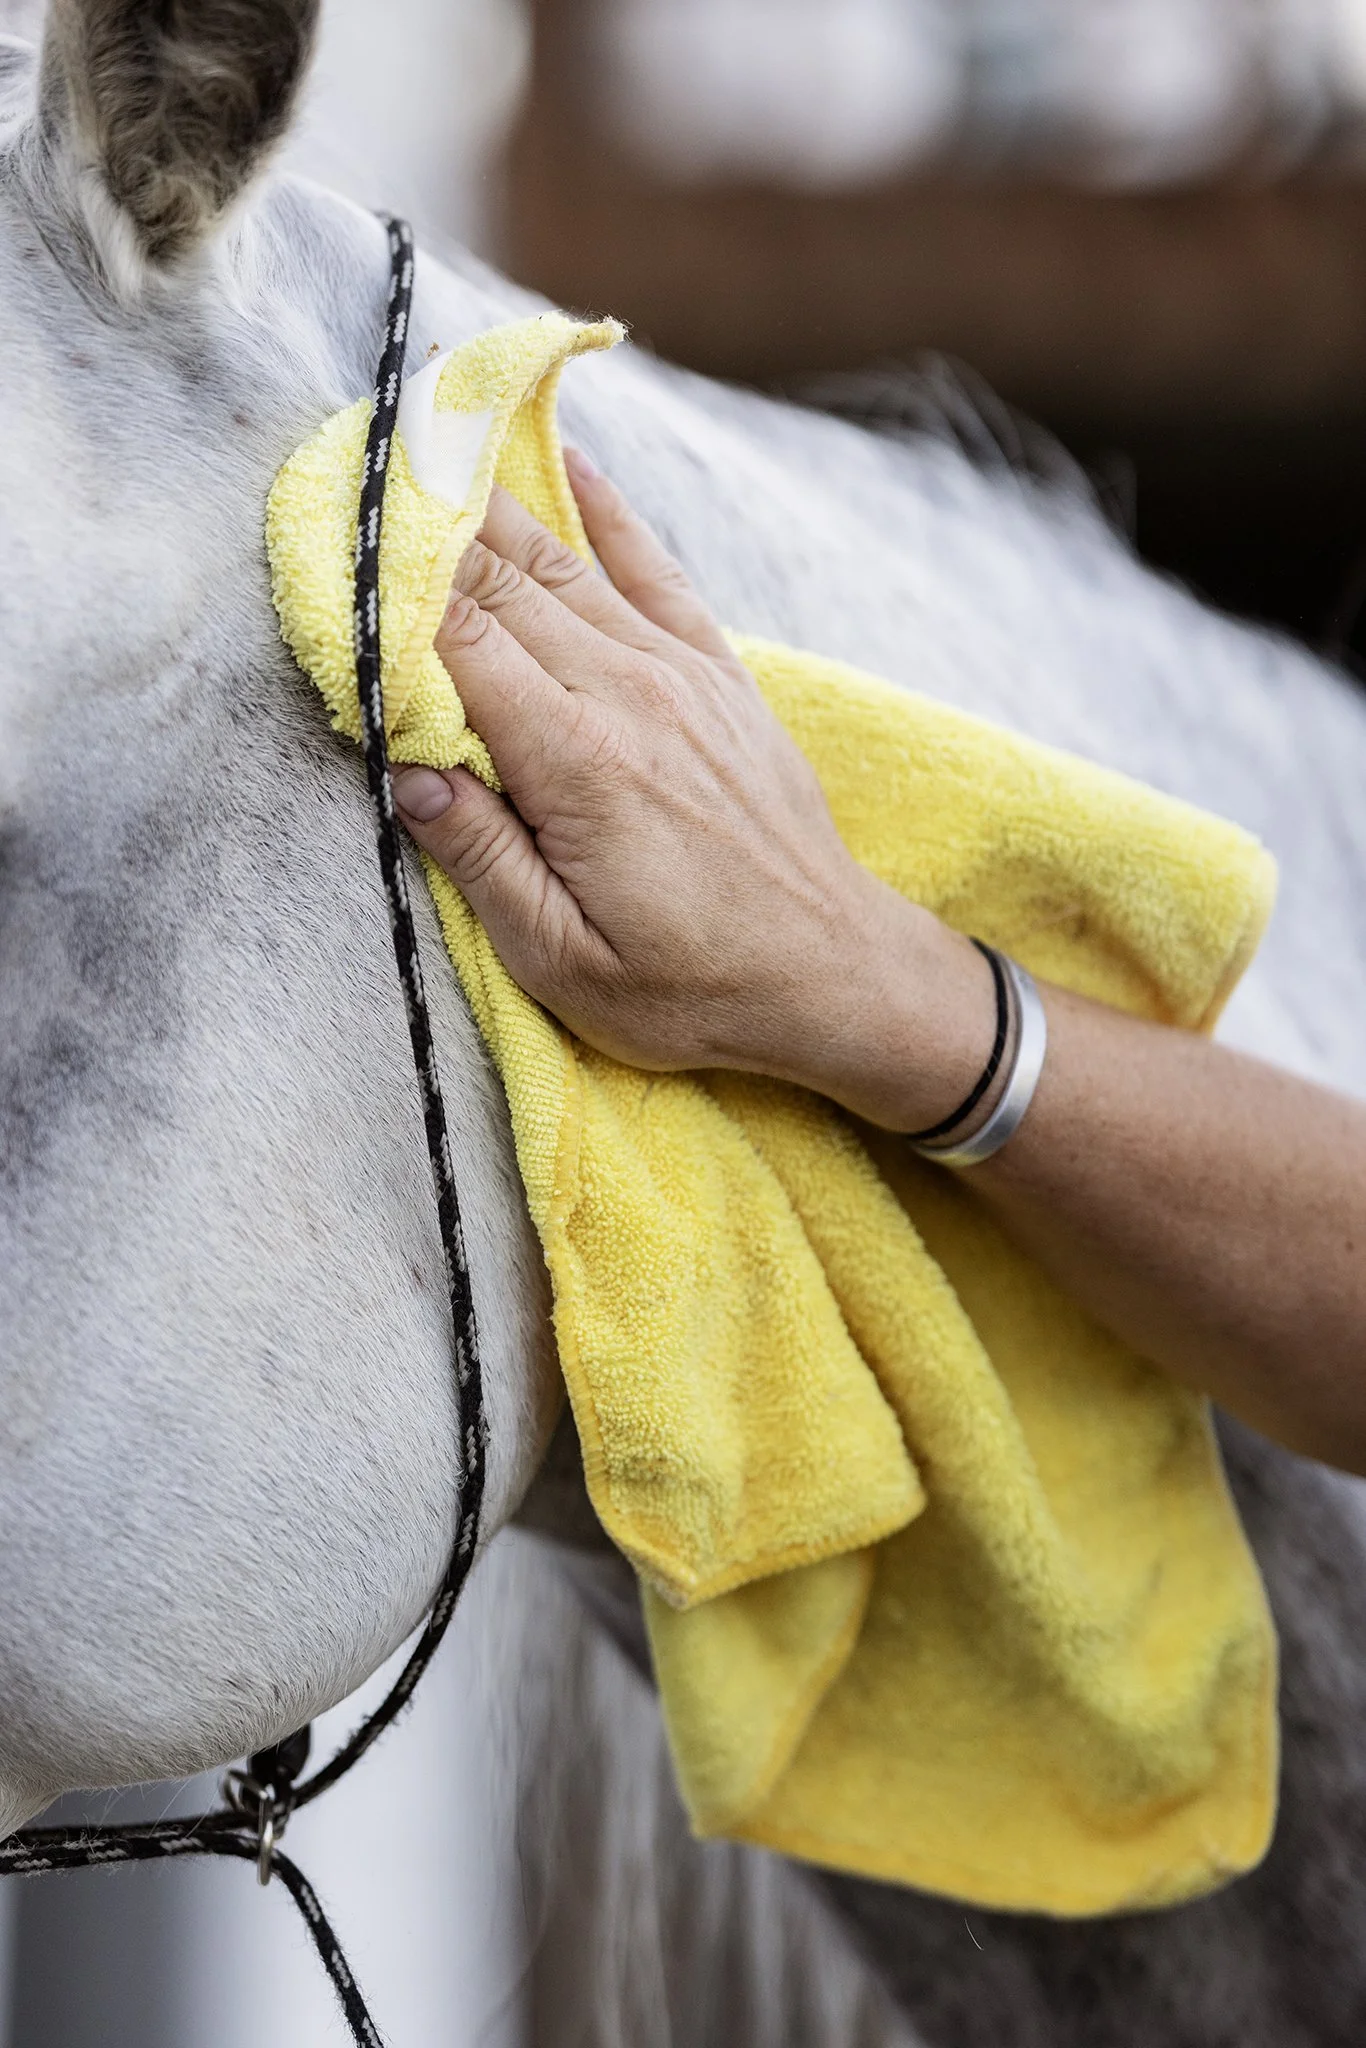
The client, a good friend of mine, Alisa, bathed and groomed her horse prior to my assistant and I getting there. When we arrived, we looked at the lighting available between her barn, garage and run in shed, needed flat lighting, level but not slippery footing for shoes, and a wide enough doorway that her horse could stand comfortably in. For that time of day, none of those options were ideal, but Alisa did have a cement pad outside of her basement door, that offered flat lighting, level footing, and some grit to it.
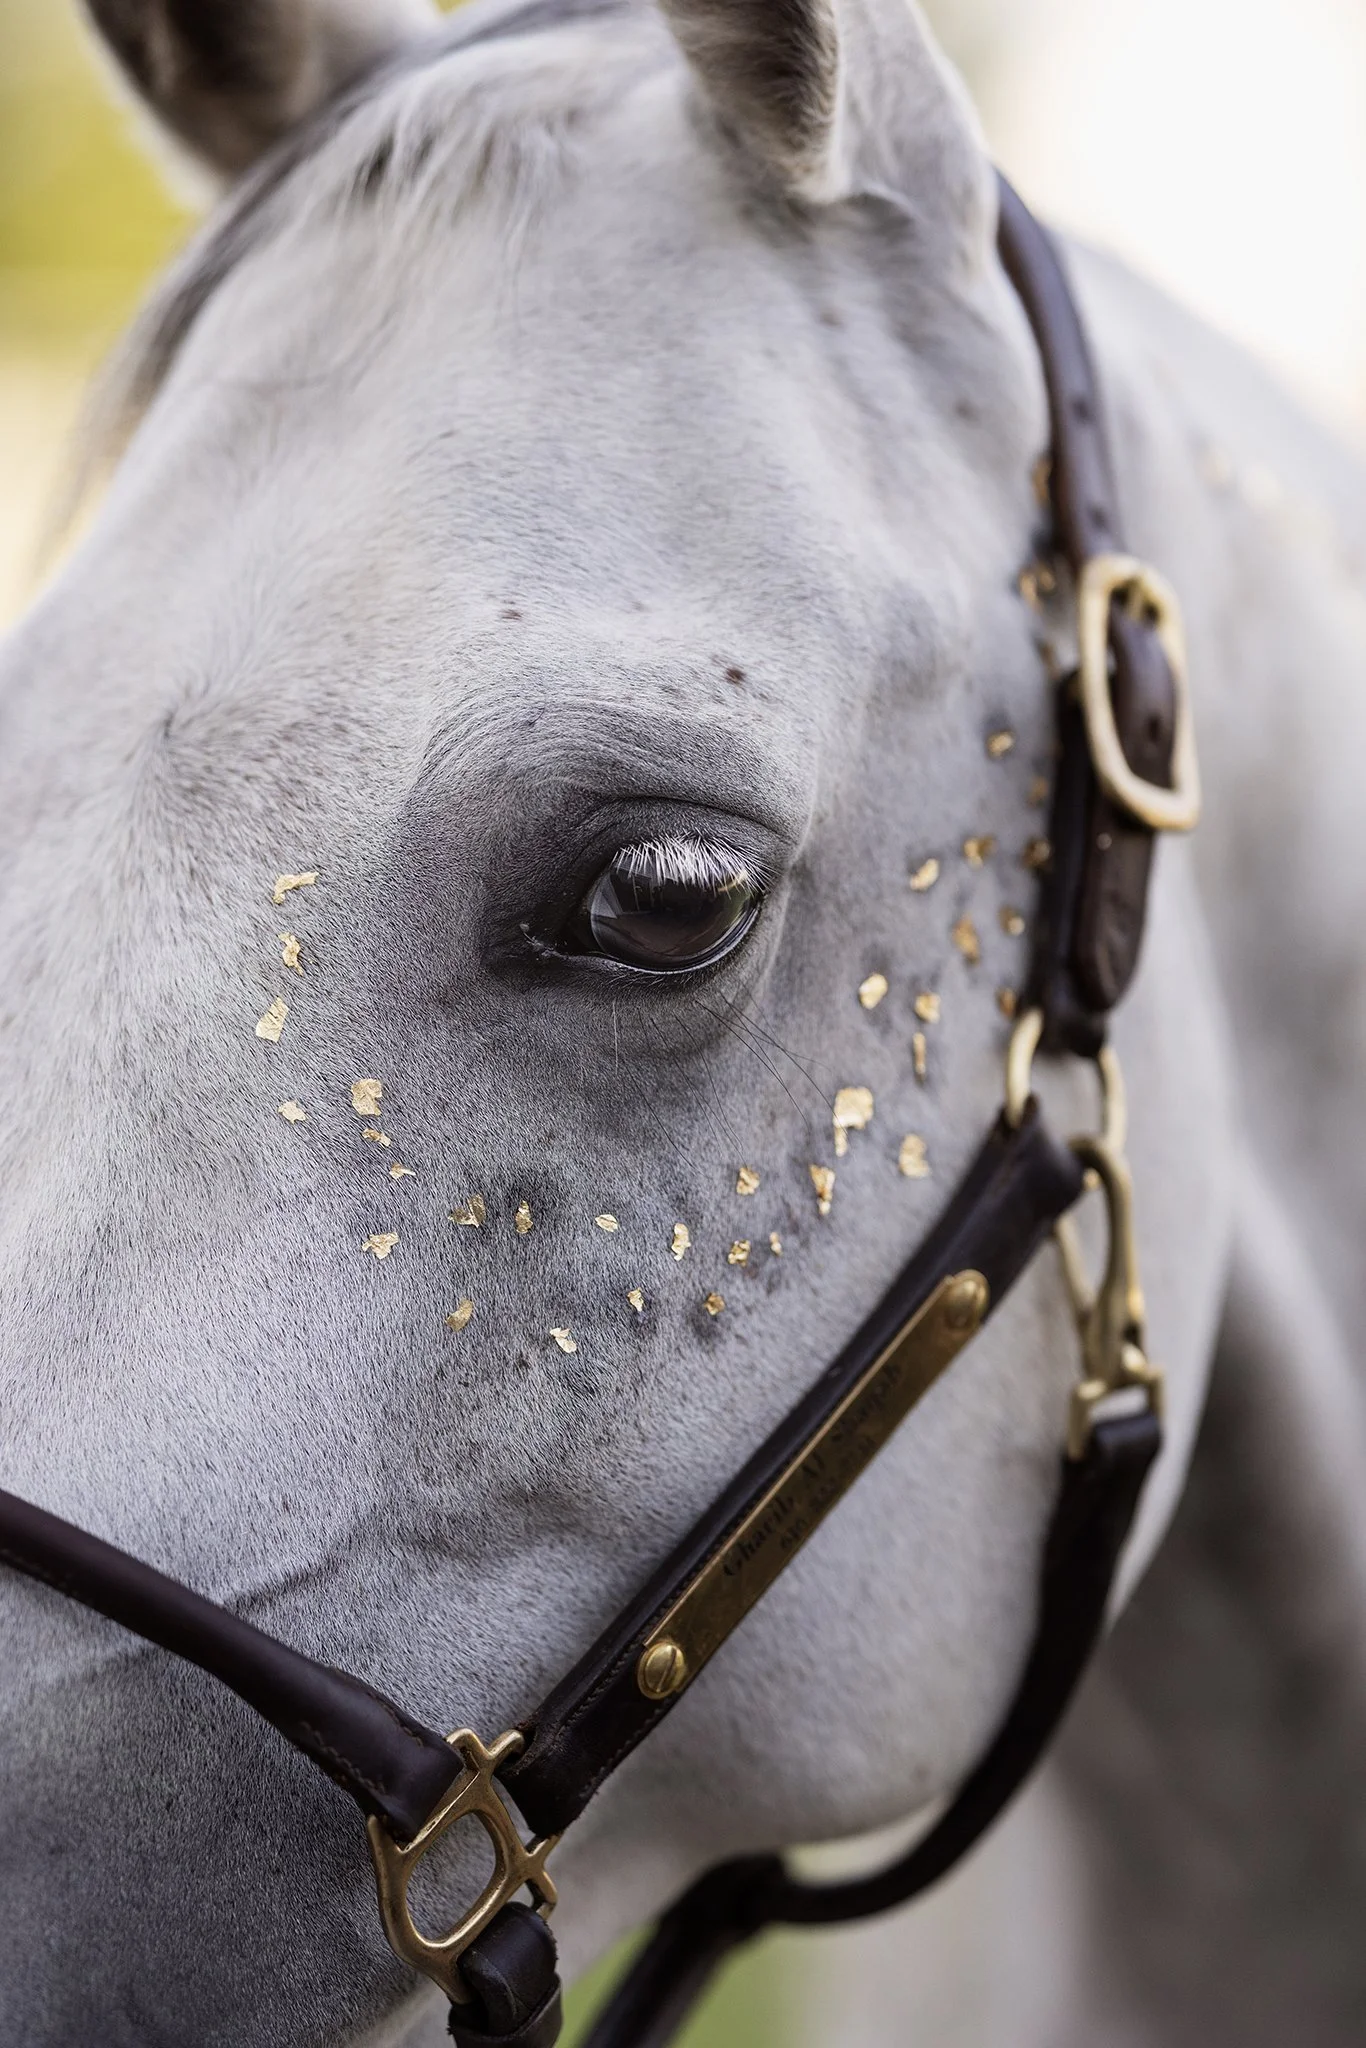
Before we could begin the process of applying the gold leaf to her horse’s head and neck, we discussed what color we wanted to work with - Gold or Silver, agreeing that due to her horse being primarily gray, that the silver wouldn’t make the POP effect we wanted. We did not take into consideration his fleabitten speckles. These speckles added texture to his coat, making the gold leaf’s texture less of a visual impact.
We then discussed where we wanted to apply it, taking into consideration the contours of bone and muscle, choosing areas that would highlight his best features and accent his Arabian dished nose and arched neck.
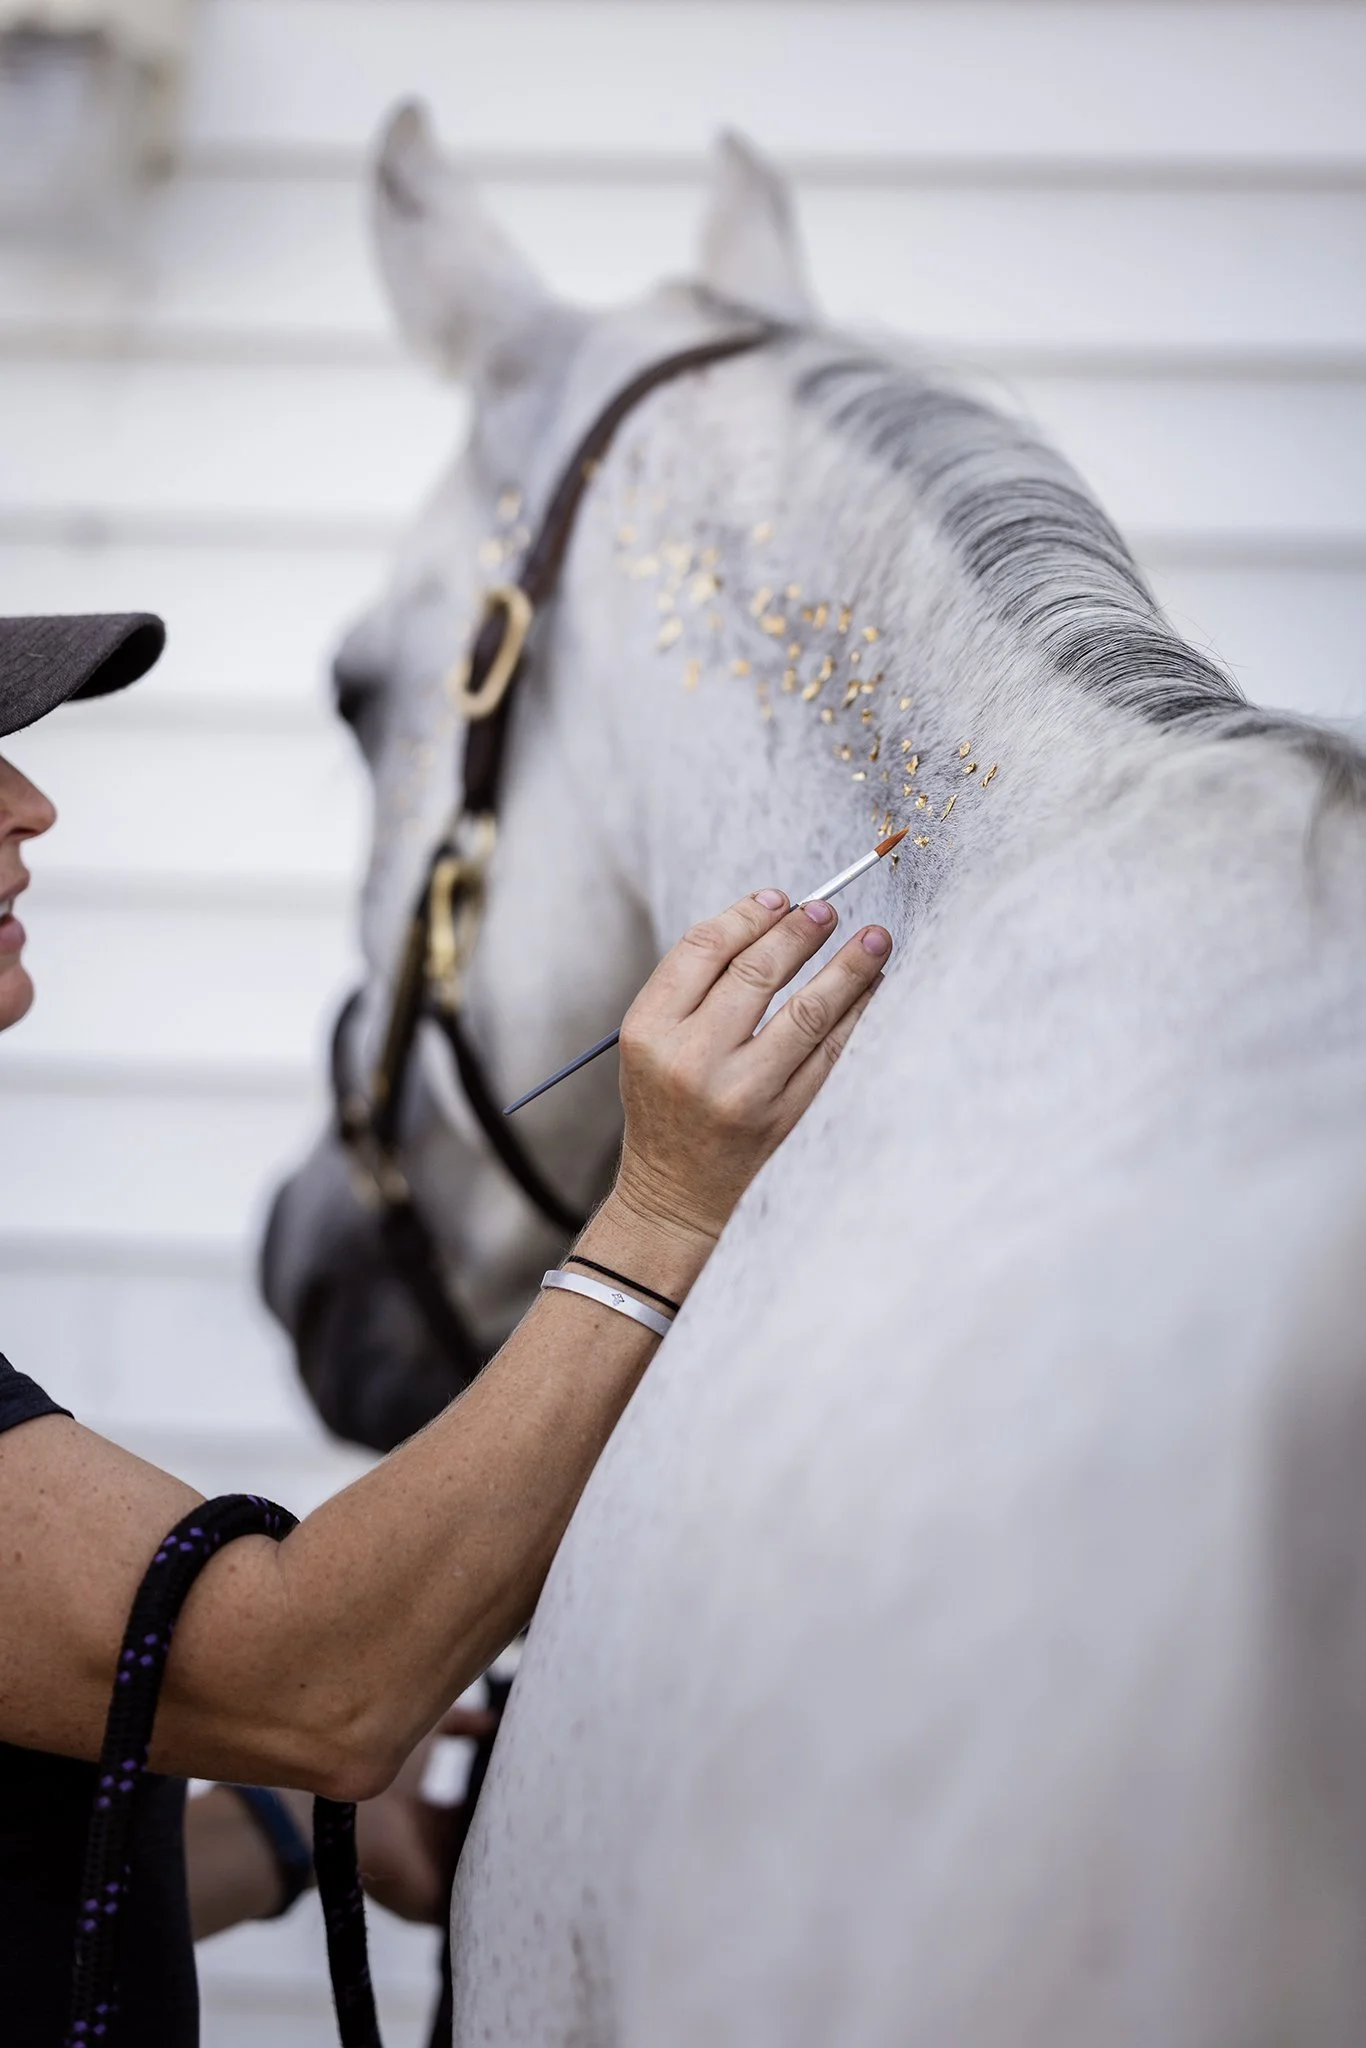
My assistant prepped the small gold leaf pieces - which we learned would easily blow away in the wind. She resorted to holding the sheet for us to pull a small piece off of when ready. She was also holding the tub of vaseline close to us so it was easier and quicker to apply it.
Alisa’s horse is wonderfully trained to stand quietly, so she continued to hold the lead while to apply the vaseline and gold leaf to his face. I was struggling trying to apply anything to the horse’s thicker neck hair, without making a complete mess, or getting vaseline and gold leaf all over myself.

METHODS USED…
Apply a small bit of vaseline to the horse, then add a small gold piece to the spot of vaseline.
Apply vaseline to the brush, grab a bit of gold leaf on the tip, and then try to roll it onto the horse’s coat.
Someone applied the vaseline with a brush, while someone else applies a larger piece of gold leaf to see if it would stick/rip off.
Applying vaseline and then dumping a bunch of small pieces over the neck, hoping they would stick as they landed on the neck.
Eliminating myself as I was covered in vaseline and making everything sticky and greasy! I switched to photographing the BTS photos instead.


Along the way, we also learned that because the halter had a bit of movement to them, any gold we placed near the halter was getting smudged off, making more of a mess.
And we also learned quickly that shorter face hair was MUCH easier to apply the gold leaf to then the longer neck hair, agreeing that a clipped horse would be better, and a wooly horse would be a NIGHTMARE!
Another consideration we learned, was that if we needed to photograph the horse afterward without gold leaf (ex. with the owner or at liberty), we would either ONLY be able to use the opposite side of the horse to hide the vaseline, or we would have to bathe and dry the horse before continuing photos, OR I would have to spend forever editing it off from the horse in photoshop….

The entire time, I am trying to think of an easier, quicker, less messy was of applying this. I HATE wasting time, especially if there is a better route.
Alisa is a wonderful friend, and doing this project with her was an excuse to spend time with her. However - I kept thinking about how time consuming this would be with a client and a horse who didn’t have superior ground manners and patience. I think some of my clients would be able to follow pre-written directions and choose pleasing areas to add the gold leaf to, BEFORE I arrived to photograph the horse. But I would see it being an absolute disaster too, arriving to a frustrated client, and a pissed off horse who needed a bath and time to decompress. … Which means I would have to add at least 45 minutes, if not 60+ minutes to the sessions, where I would show up with the supplies and apply the gold leaf myself. … and then how much more money would I have to add to the session fee to cover my time applying this … but also cleaning it up in photoshop… …. …. is it worth it?


After 30-40 minutes we decided that what we had gotten to stick to the horse, was what we were going to have to work with. The horse was starting to get impatient and we knew that if we gave him a break in his stall, the sawdust and hay would end up sticking to him, making it a HUGE mess and unusable, so opted to change to photographing, and used the 10 minutes we had left of the horse’s patience to create a few portraits.

While editing, I quickly learned a few more things …
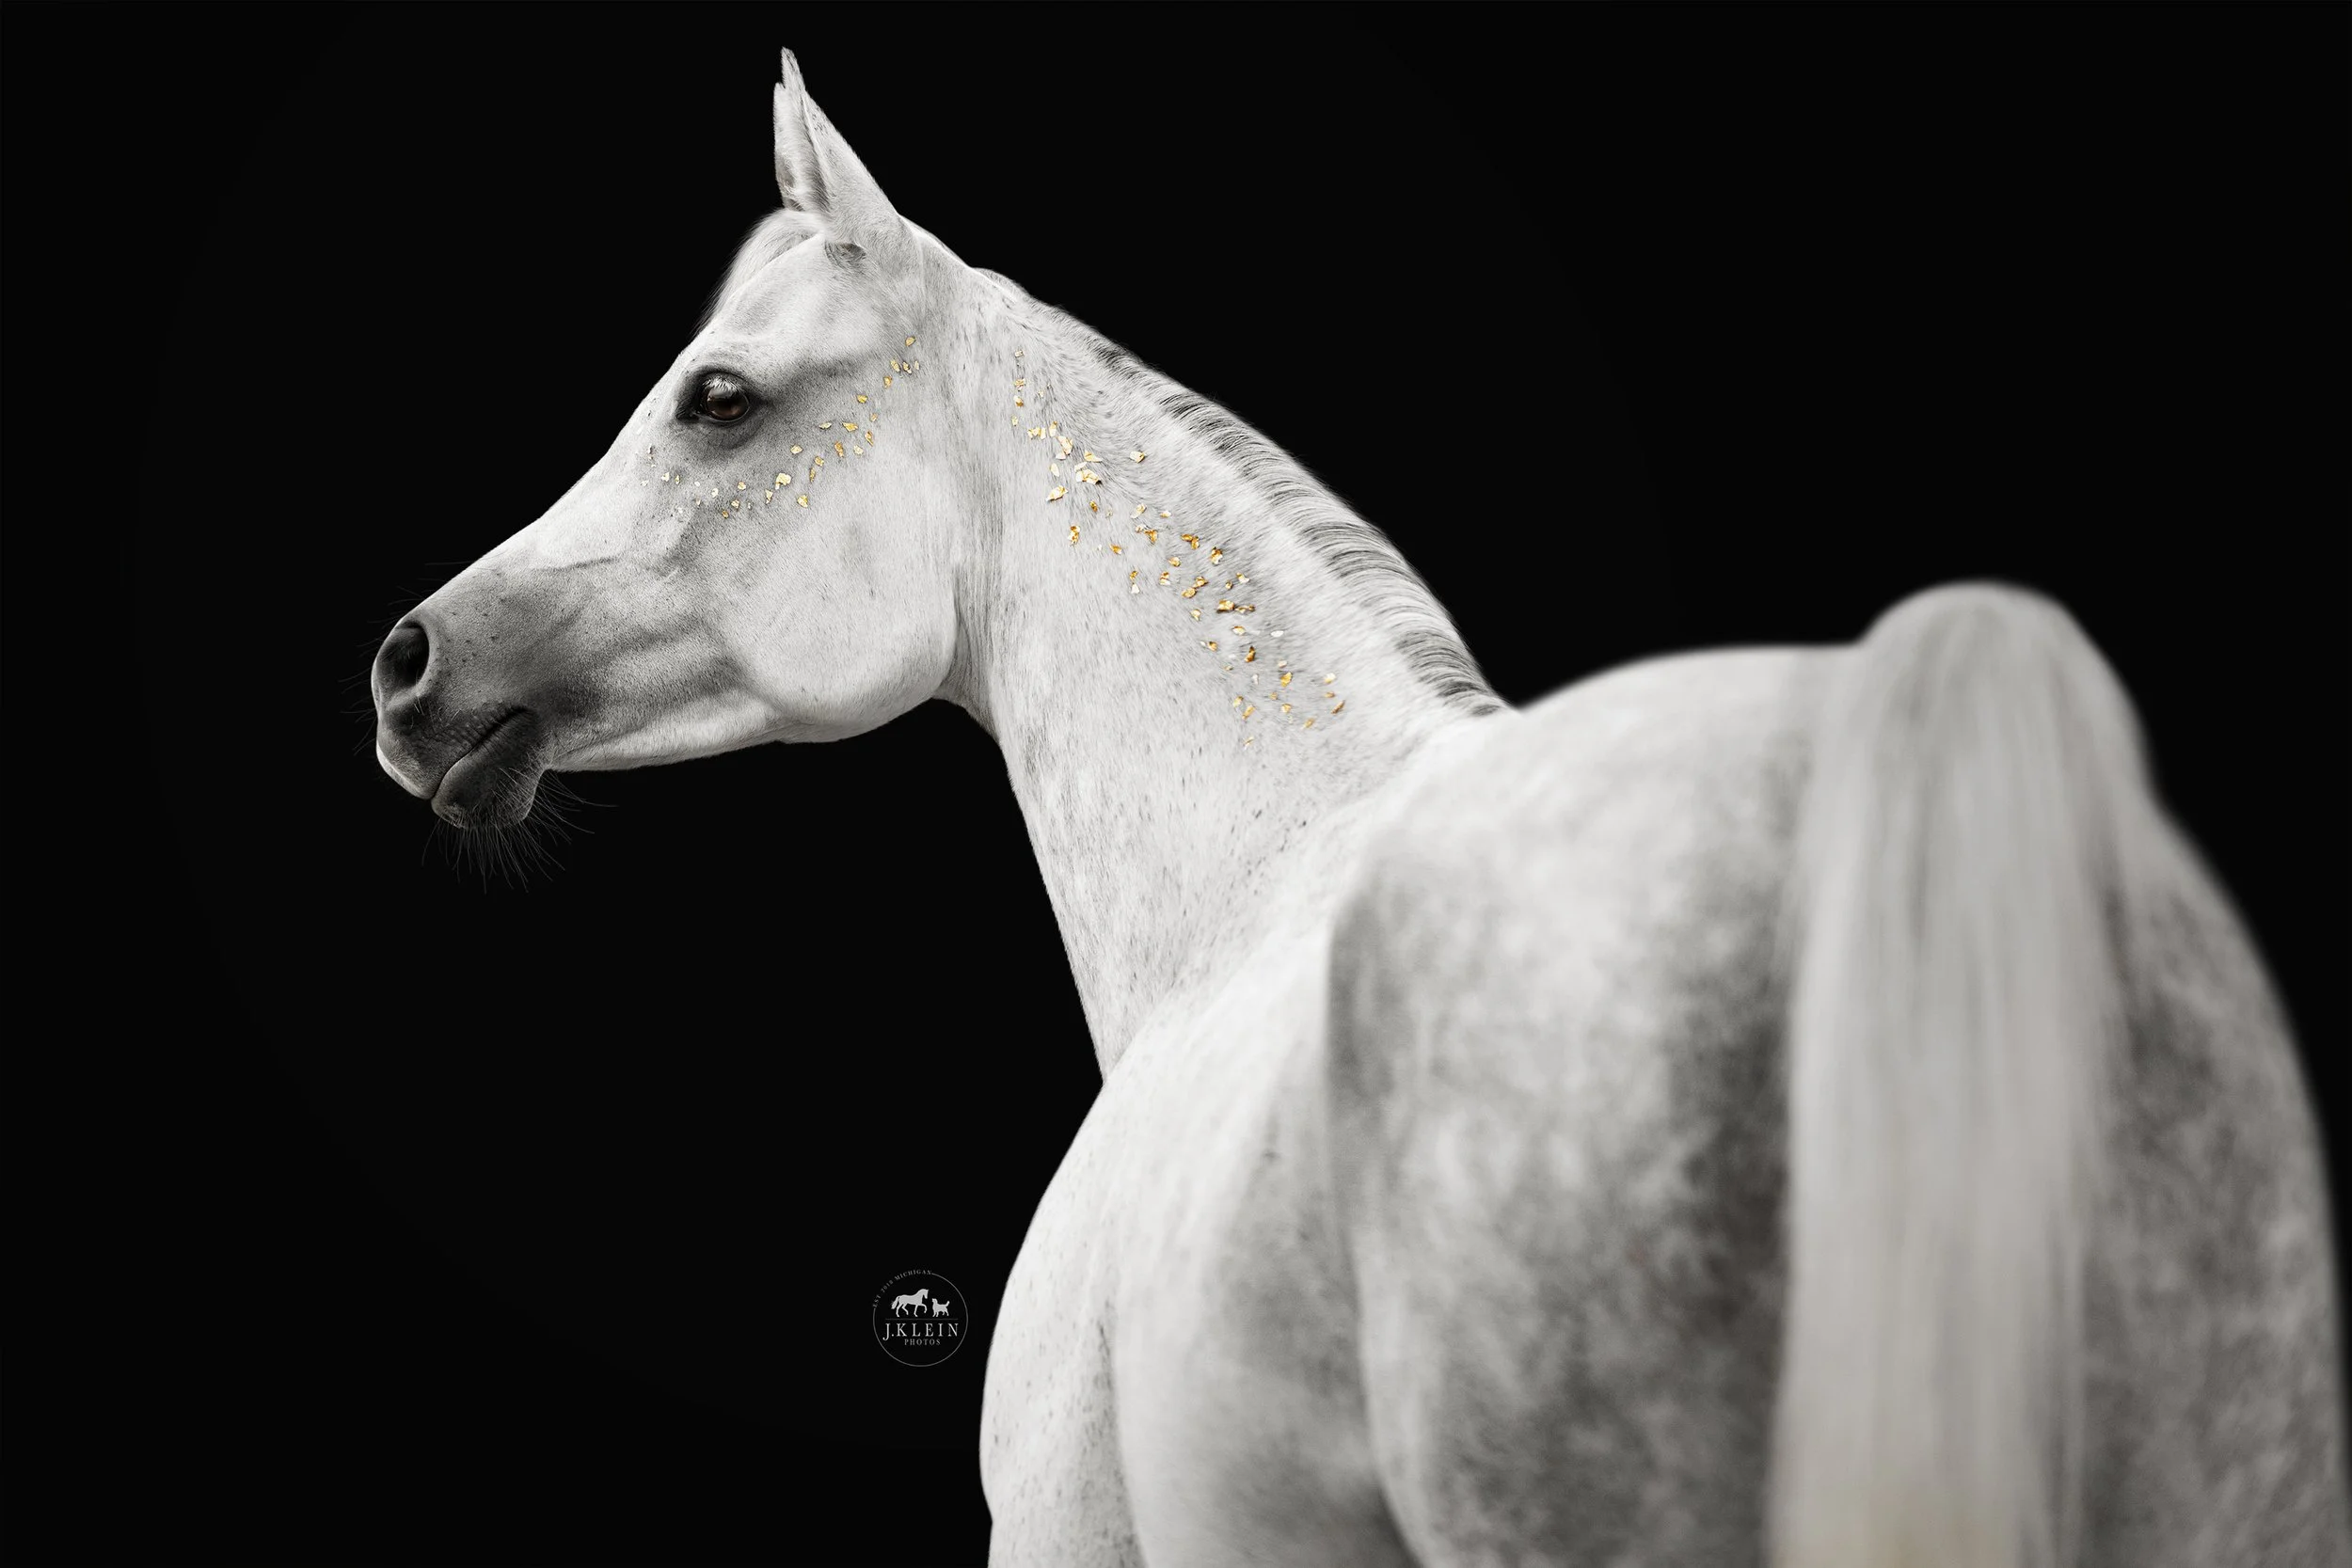
The color of the background can make a big difference on how the color of the gold leaf POPs. I tried both a black background and white background, as well as saturating the gold color. The horse POPS from a black background more, and I liked an off white background over a stark white background as another option.
I had SO MUCH vaseline to remove from the horse. As time went on, the vaseline spread to the surrounding hairs, making larger wet spots, which was VERY time consuming to remove around each piece of gold leaf.
The amount of gold leaf we added - took forever - and did not make the impact we wanted. We needed 3-5x more gold leaf over the areas we applied it to, and even then, I felt it was incomplete ending before the withers.
At the end of the day, I changed tactics and went searching for gold leaf photoshop brushes, and found a set on creative market, 24K Metallic Gold Brush Gold Effects. I downloaded them, spent an hour familiarizing myself with the different brushes and the brush settings, before applying them to my images.

It was the answer I was looking for!!!
Holy Moly was using photoshop brushes WAAAYYY easier than what we did! I could pick and choose the size of the gold flakes, place them exactly where I wanted them, and add as much or as little as desired.
NO Mess!
NO extra time needed before photographing!
Ability to photograph the horse afterward without bathing them!
Ability to apply gold leaf to any portraits, providing the clients an option to enjoy the image with or without the embellishments!
BONUS - In photoshop, I can change the gold to whatever color the client desired.

After learning this new trick, I threw away all of my supplies, and added the photoshop brush trick to my tool belt. 1000% worth it. The images above and below are examples of our time, effort, and mess of a job applying it ourselves, vs the image that shows the results of the photoshop brushes applied.


WAS IT WORTH IT?
Yes, because even though the efforts could be considered a “failure,” I gained valuable knowledge on the process, what works and what does not work. I thought outside of the box, and gained new photoshop tools and skillsets that I am confident offering my clients going forward. And I also got to enjoy a memorable evening with my friends - despite being a sticky mess.