
Posing Guide for Photographing Horses
How you pose a horse for a portrait can make or break your photograph. Here are my best tips to set yourself up for success and elevate your photos of horses. (Images below are straight from my camera, and have not been retouched.)
1. Know the horse breed and/or riding discipline. There is a BIG difference on how you would photographing a hackney pony who drives, vs a quarter horse that dominates the western pleasure world. A big of research a head of time on the breed and/or discipline can set you up for success, but when in doubt, don’t be afraid to ask the client, as it shows you care about the details of their images.

2. Legs. Nothing makes my eyes twitch more when I see a horse standing like a drunk giraffe. Take the time to either square the horse’s hooves, park them out, or stack them as desired. If the horse won’t allow for their legs to be placed, I always prefer to see all four legs, or will capture the horse in motion, taking a step forward.

3. Elbows. When you reposition a horse, especially when asking with a turn on the forehand or haunches, step the horse back and then forward to ensure all four hooves are going the same direction. This will also ensure that elbows or hip bones aren’t popped out.

4. Weight distribution. Nobody wants a photo of their horse looking like a wet noodle blowing in the wind. Make sure the horse’s weight is balanced centered over their front hooves. This will ensure that their chest and shoulders are equally balanced in your photos too.

5. Butts. I like big butts and I can not lie! Well, actually I like round butts, and not triangular butts. Make sure your back legs are set under the hocks (or further out if breed standard calls for parking out), especially for the back leg closest to the camera. This gives the butt a rounder and more muscular appearance, vs a triangular and weak hind end.

6. Muscle Tone. Engage those muscles! This can transform your horse from a lazy couch potato into a show stopping and awe striking horse.

7. Bending. Under bent will shorten their neck, or make it appear as if they have NO neck. Over bent will stretch out the topline and turn your horse into a drunk giraffe with unbalanced weight. Learn your angles or be ready to shoot through the movement!

8. Ears up! Unless you’re getting bloopers or the horse is listening to communication coming from two different directions, those ears should be up and forward. This gives the horse the air of more confidence, desire to either connect with the viewer, or commit to the movement they are doing in the image.

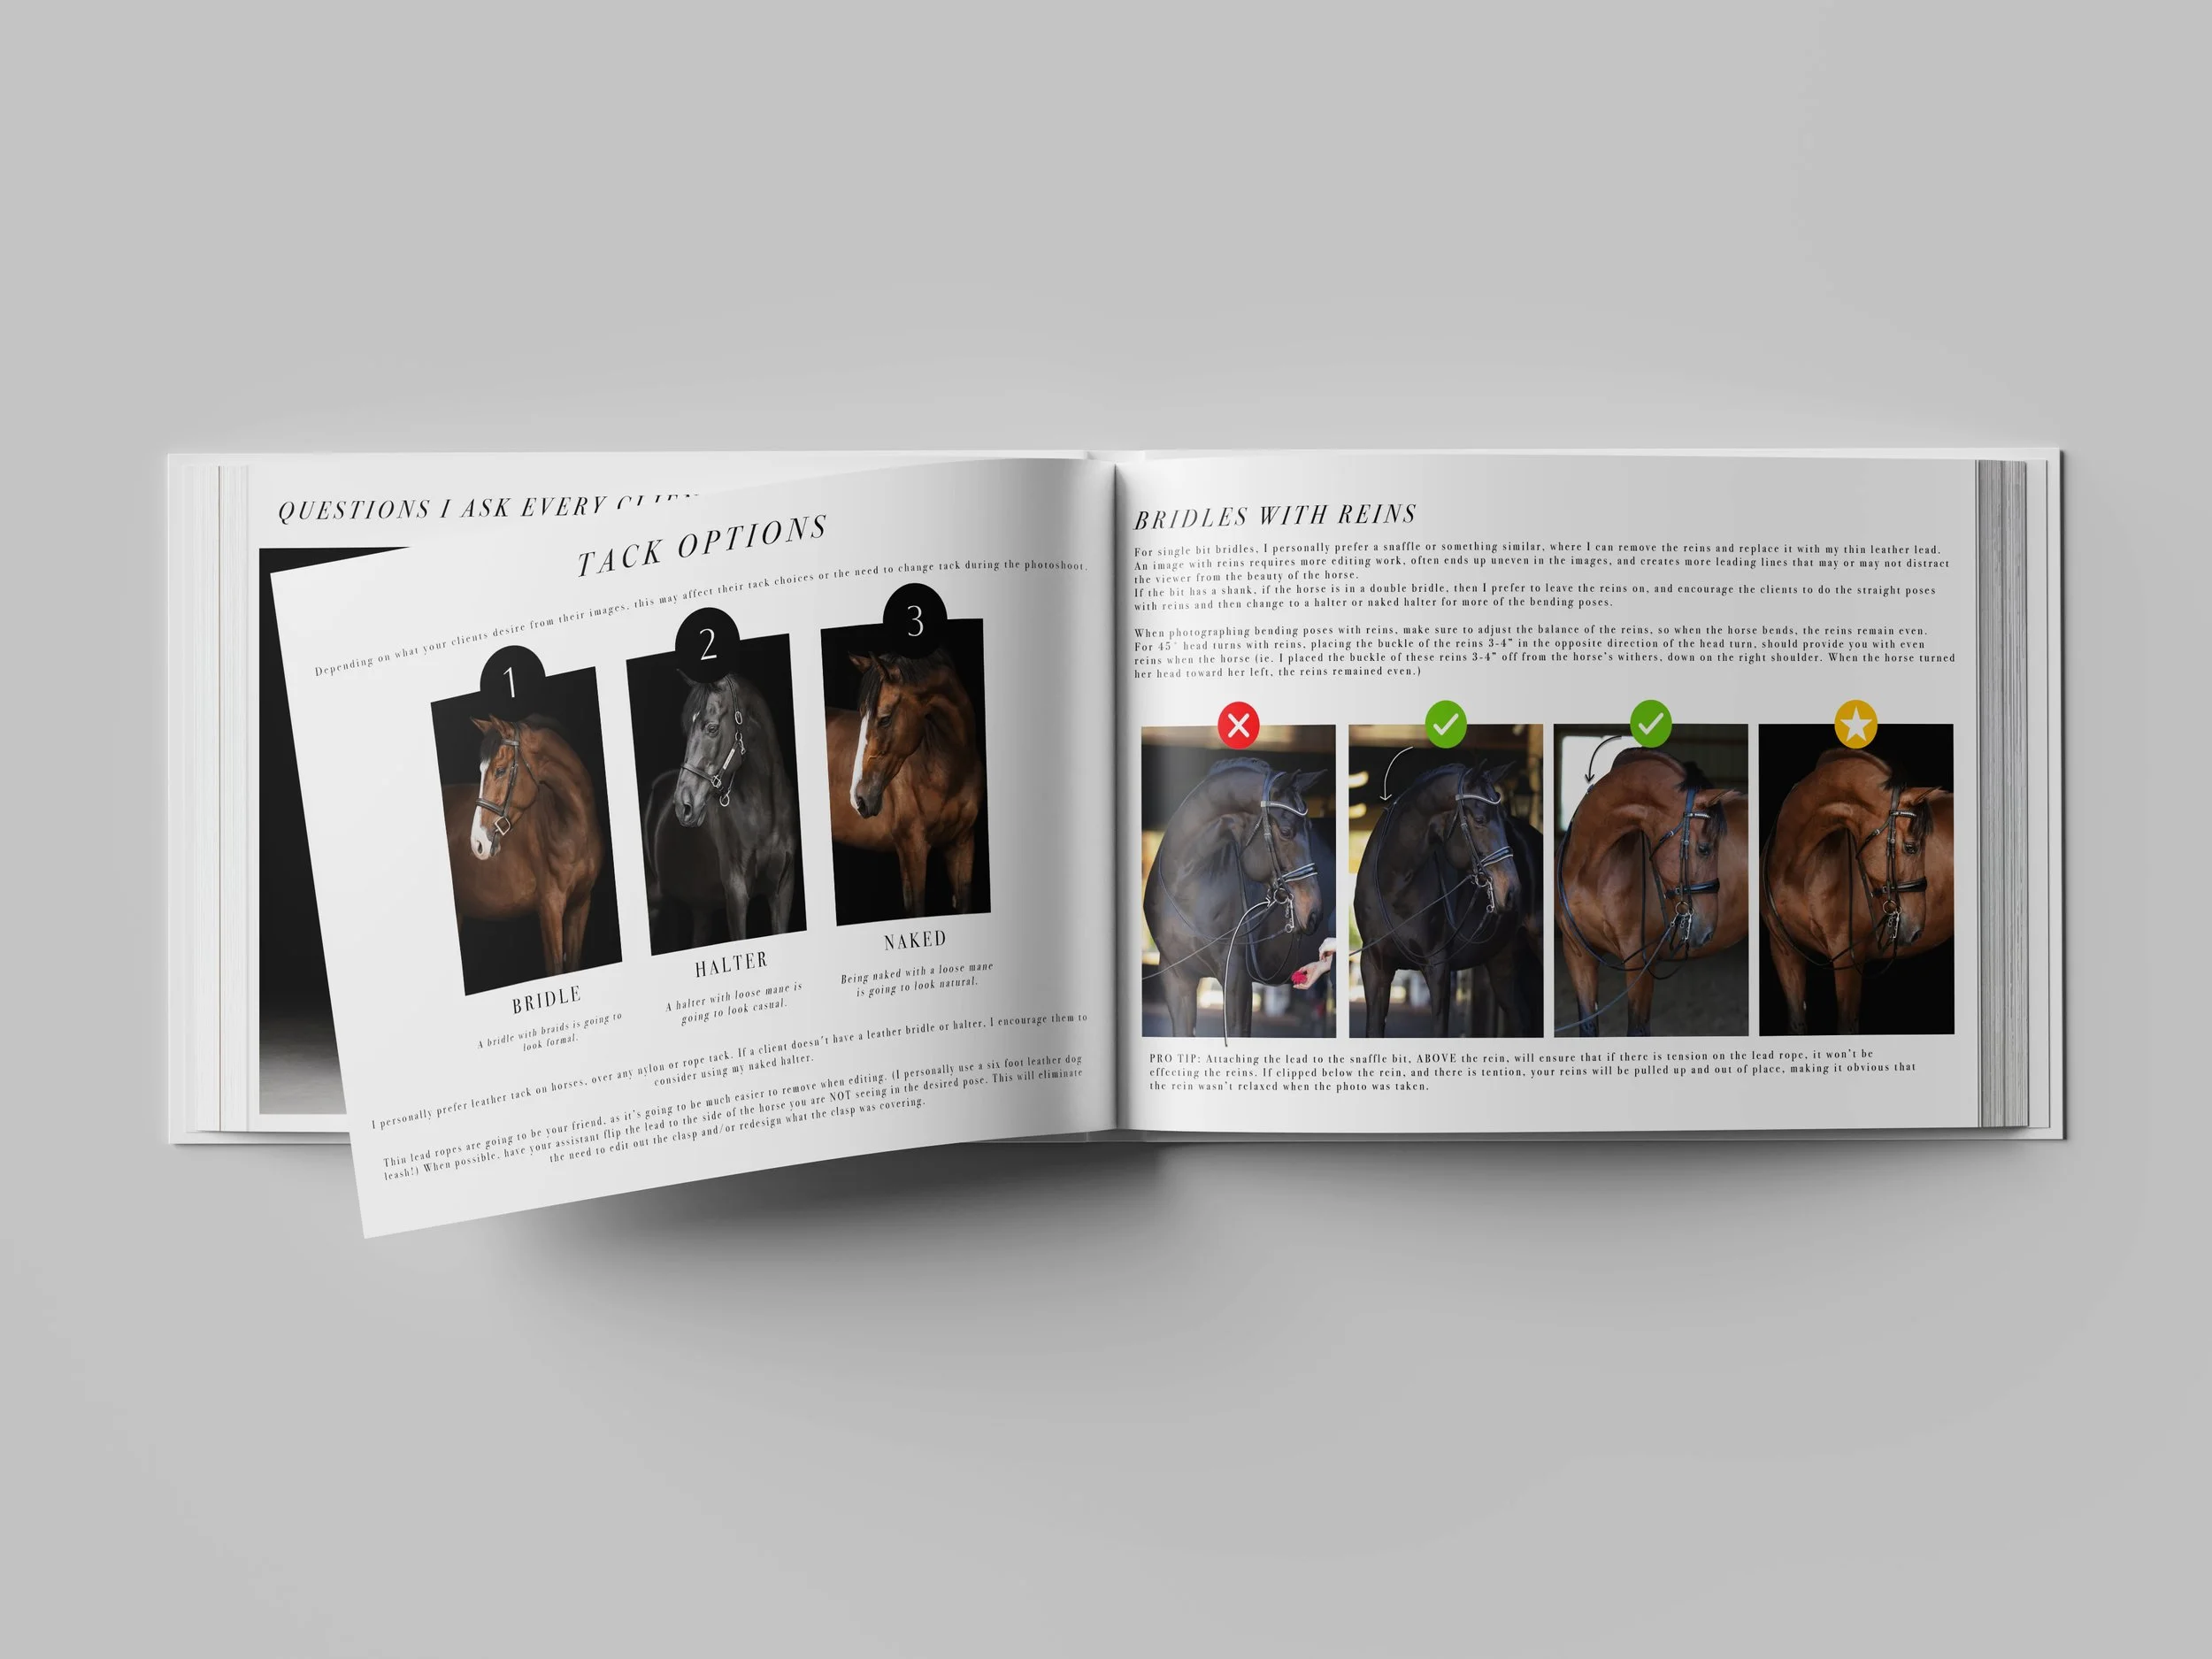
9. Details. Take a moment to fix the details before you photograph. Reposition bridle keepers, adjust the reins so their loops are even, remove the grass from the horse’s mouth, wipe off slime, clean out dirt from the nostrils, rebrush flyaway manes or forelocks, etc. etc. These seem like little things, but when your little details are in order, they will make your image go from good to GREAT!

10. Expression. This is most important, to the horse AND the owner. If your horse is showing tension or discomfort, you should not be photographing portraiture work until their needs are addressed. Focus on creating an atmosphere when your horse is comfortable and happy to engage. This will result in positive body language and expressions, making it a much more desirable image for fine art and/or sentimental portraits for your clients.

I hope this was helpful! Give yourself some grace as you learn to recognize, and either work with the horse’s behavior or find a clear way to instruct the owner to correct these horse posing details. Now go grab your camera and have fun at the barn!
Want to learn more?
I offer private virtual and in person mentorships, group workshops, and downloadable courses!
Equine Portrait Posing Guide
A step by step guide to learn my 20+ poses for fine art Equine Portraits using natural lighting. Available as a PDF download.
Horse & Rider Posing Guide
A step by step guide to learn my go-to poses when photographing Horses & Rider. Available as a PDF download.